

The scent of cocoa still takes me back to Nonna’s sunlit kitchen on Easter morning. My small hands, sticky with anticipation, reached for the brightly colored basket. Nestled amongst the treats, gleaming like a jewel, was a giant chocolate egg. Oh, the magic of those chocolate eggs! Nonna would carefully unwrap it, the foil crinkling, then crack it open to reveal tiny truffles and candies.
That moment of pure childhood joy became a core memory. Even as I grew older, the fascination remained. I wasn’t content with store-bought eggs anymore. I needed to recreate that magic, to understand the alchemy of chocolate. So I embarked on a quest, experimenting until I perfected my own homemade chocolate eggs recipe.
This recipe, which I’m thrilled to share, is for anyone wanting to create edible treasures. Whether it’s Easter, a special occasion, or just a moment you want to fill with childhood wonder, this guide will walk you through every step.

Table of Contents
Why Homemade Chocolate Eggs Are So Special
Homemade chocolate eggs have a richness and charm that store-bought versions often lack. With a glossy shell and decadent fillings, they’re the perfect treat to celebrate spring. If you’re in the mood for something sweet and salty, you won’t want to miss white chocolate pretzels—a delightful spring-ready snack with crunch and charm.
Chocolate eggs aren’t just a dessert—they’re steeped in symbolism and history. In many cultures, eggs represent new life and rebirth, and chocolate eggs became popular in the 19th century. Today, countries like the U.S., Canada, Brazil, and Mexico have all embraced them as part of Easter traditions.
These homemade eggs are:
- Customizable for any dietary need (vegan, gluten-free, nut-free).
- Perfect for gifting or decorating a holiday table.
- A hands-on project the whole family can enjoy. Looking for something similarly fun and festive? Check out Ritz Cracker Cookies for another hands-on, no-bake treat the kids will love helping with.
Ingredients for Chocolate Eggs
Basic Shell Ingredients:
- 2 cups (340g) high-quality dark chocolate (or milk/white chocolate)
- 1/2 tsp vanilla extract (optional)
Optional Fillings:
- 1/2 cup peanut butter or almond butter
- 1/2 cup caramel sauce
- 1/2 cup coconut cream
- Crushed cookies, sprinkles, mini marshmallows, If you’re experimenting with textures, chocolate-covered chips offer a fun, salty-crunchy twist you might love adding as a filling or topping.
Decorations:
- Edible glitter
- Colored cocoa butter or food-safe paint pens
- Sprinkles or icing for detail work
Substitution Tips:
- Dairy-free? Use vegan chocolate and coconut milk-based fillings.
- Nut allergy? Try sunflower seed butter instead of peanut butter.
- No chocolate mold? Use plastic Easter eggs lined with cling wrap.
Sourcing Tips:
- Buy couverture chocolate from a specialty grocer or online (it melts better).
- Look for ethically sourced cocoa for better taste and sustainability.
Step-by-Step Instructions to Make Chocolate Eggs
Step 1: Temper the Chocolate
- Chop the chocolate finely.
- Melt 2/3 of it over a double boiler until it reaches 115°F (46°C).
- Remove from heat and stir in the remaining 1/3 until it cools to 82°F (28°C).
- Reheat slightly to 88–90°F (31–32°C).
Pro Tip: Tempered chocolate will look glossy and snap when broken.
Step 2: Coat the Molds
- Pour tempered chocolate into each half of the mold.
- Tilt and rotate to coat evenly.
- Pour out excess and scrape the edges clean.
- Let it set for 5–10 minutes in a cool place.
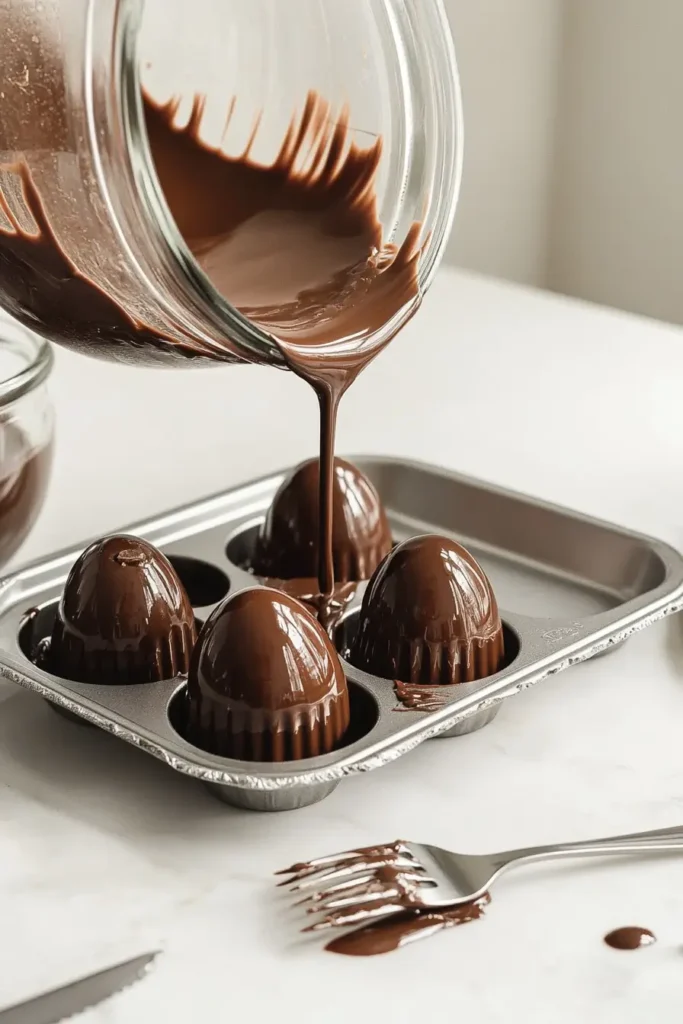
Pro Tip: Do two layers for a sturdier shell.
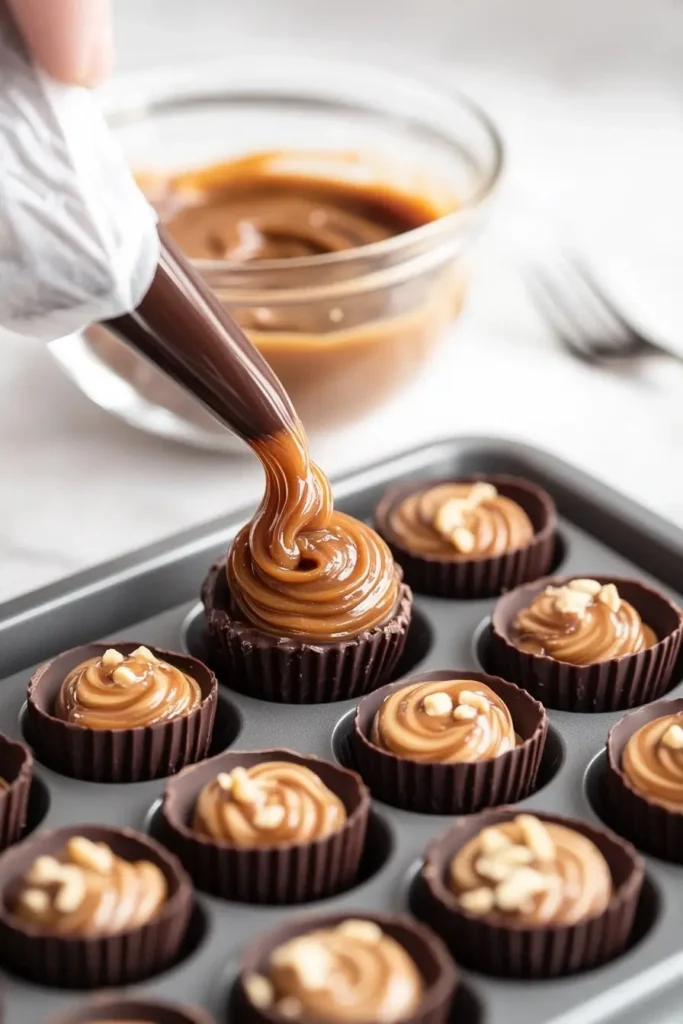
Step 3: Add Fillings
- Pipe or spoon in desired fillings once the shell sets.
- Avoid overfilling—leave 1/4 inch space from the edge.
Step 4: Seal the Egg
- Warm the edge of one half briefly on a hot pan.
- Press halves together until sealed.
- Let sit for 5 minutes.
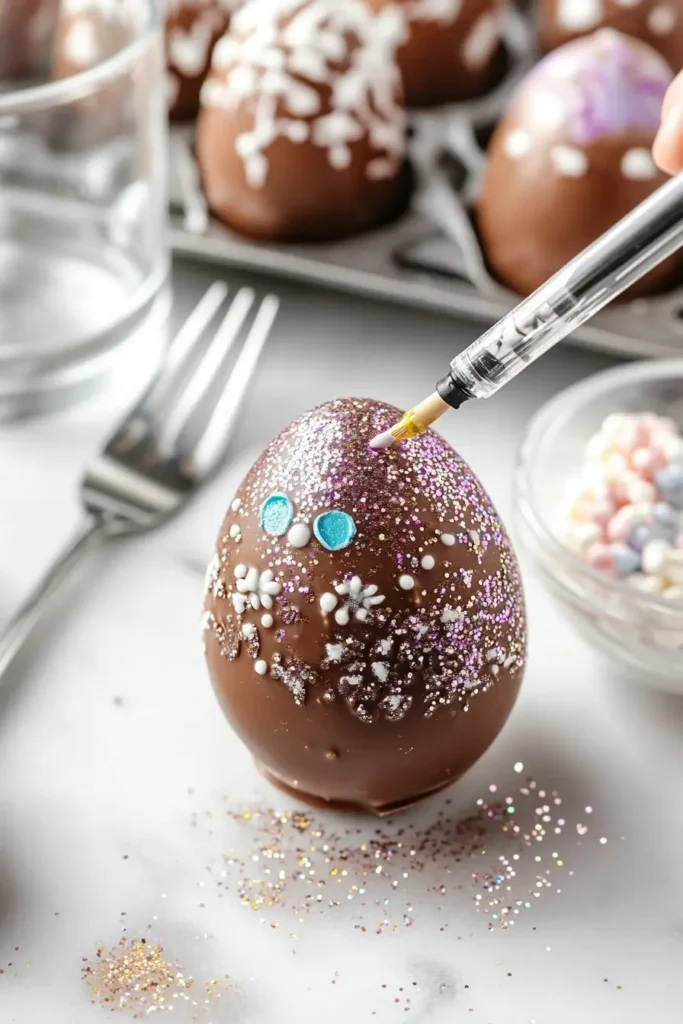
Step 5: Decorate
- Paint with colored cocoa butter
- Add sprinkles, icing designs, or edible glitter
Common Mistakes to Avoid
- Skipping Tempering: Un-tempered chocolate will look dull and melt in your hands.
- Rushing the Shell: Let each layer fully set to avoid weak spots.
- Wet Molds: Moisture causes chocolate to seize—make sure everything’s bone-dry.
- Overfilling: Too much filling can cause leaks when sealing.
Variations and Customizations
Vegan Chocolate Eggs
- Use dairy-free dark chocolate.
- Fill with coconut cream and crushed nuts.
Gluten-Free
- Avoid cookie-based fillings or use GF-certified brands.
Keto-Friendly
- Use stevia-sweetened chocolate.
- Fill with nut butter and a touch of sea salt.
Flavor Ideas
- Espresso and dark chocolate
- Orange zest with milk chocolate
- Chili-spiced chocolate with salted caramel
How to Serve and Store Chocolate Eggs
Serving Ideas:
- Arrange in a decorative bowl with shredded paper.
- Serve alongside espresso or sweet dessert wine.
- Include in Easter brunch spreads.
Storage:
- Store in a cool, dry place up to 2 weeks.
- Avoid the fridge—it causes condensation and sugar bloom.
Freezing:
- Wrap tightly in plastic and freeze for up to 2 months.
- Thaw at room temperature before unwrapping.
Frequently Asked Questions
How to make chocolate brownies without eggs?
Try substituting each egg with 1 tbsp flaxseed meal mixed with 3 tbsp water. Let it sit 10 minutes before mixing into your batter.
Are Cadbury chocolate eggs gluten-free?
Some Cadbury eggs are gluten-free, but always check the label. Cross-contamination is possible depending on the production line.
Can you make chocolate chip cookies without eggs?
Yes! Use mashed banana, yogurt, or applesauce as a binder.
Does chocolate have eggs?
Pure chocolate doesn’t contain eggs, but fillings or additional ingredients might. Always check the packaging.
Conclusion: Make Sweet Memories with Chocolate Eggs
Whether you’re reviving an old family tradition or starting a new one, making homemade chocolate eggs is a heartwarming project that brings people together. With a little creativity and the right technique, you can turn simple ingredients into show-stopping treats.
Have questions or want to share your creation? Leave a comment below—I’d love to hear how your chocolate eggs turned out!
Don’t forget to pin this recipe and tag me on Instagram @savordelish when you share your chocolate creations!